Over on The Sweet Setup, Curtis McHale wrote a detailed comparison between what we think are three of the best note-taking, writing, and research apps: Ulysses, Bear, and Apple Notes.

Now, I realize there are LOT of other apps out there in this space. I can think of several other excellent apps right the top of my head. But we chose to focus on three apps that are most commonly top-of-mind for most folks right now.

For me, personally, it’s no secret that I use Ulysses for just about everything. (I’m writing this very link post in Ulysses right now.) I also use Bear quite a bit — as my central spot for “throwaway notes” such as shopping lists, errands, and other tidbits of short-term data. I would prefer to use Apple Notes, but its UI is a deal breaker for me.

Ulysses, Bear, or Apple Notes?

This is what my Ulysses writing interface looks like on my iPad (which is where I spend about 90% of my writing time):

I’m currently using a modified and simplified version of the default Freestraction theme along with the custom font, iA Writer Duospace.

What I like about Ulysses’ ability to let you adjust your own theme is that you can design the look and feel of your writing app to suit your own writing needs and preferences.

It sounds kinda obvious, but I actually think it’s a big deal.

You and I have have different writing styles, goals, and preferences. And having the ability to create a writing environment that you actually like is important.

For me, I want my text formatting to be nearly invisible.

Because, when writing, you want to focus on the feel of the text not the think of it (which is the entire point behind why John Gruber created Markdown in the first place).

Anyway…

With all that said, today we just posted a quick-start guide that shows you how to find, download, install, and customize your own themes within Ulysses.

When you are writing, what is the feel of the text that best helps you to focus and do your best work? If you don’t love the feel of Ulysses, here’s how to change it to suit your mood. Heck, you could even set up a Day Theme and a Night Theme.

How to Customize the Look of Ulysses

True story. I was up until 11:45 last night getting a few final details in place for this new course launch. (For context, I normally go to bed at 9:30.)

Even though we’ve been working on this update to Learn Ulysses for the past 4 months, a few things still came down to the wire (for me, at least).

And I have to say that wow, I am just so happy with how this course turned out! It never would have happened without the incredible team at The Sweet Setup — everyone worked together on this new course to make it something world-class. A huge thanks to Mike, Matthew, Josh, Jeff, Isaac, Chris, and Joanna!

I am someone who is constantly trying to wrangle ideas and keep my writing organized. And I am so glad that I went “all in” with Ulysses a few years ago — it has been a game changer for me. And even more so now that I use my iPad for just about everything. (The Ulysses iPad app is phenomenal.)

The whole reason The Sweet Setup exists is to help people find and use the very best apps. And so I love being able to put together these training courses for my “must-have” apps like Ulysses, et al.

Anyway…

Right now, since it’s the launch week, the new Pro tier of Learn Ulysses is on sale for 20% off. (That will be until Friday.)

And if you are one of the 2,500 folks who bought the original version of Learn Ulysses before today’s update then we’ve got upgrade info for you right here.

The All-New Learn Ulysses Course

Matthew Cassinelli put together this fantastic guide for quick capture in Ulysses on iOS. He goes over the built-in share sheet (which is what I use about 5 times a day). And he also gives several examples of custom Shortcuts (with download links) for automating the capture of ideas, notes, and more.

Side note: On this Tuesday 26 March, we are shipping a huge update our Learn Ulysses course over on The Sweet Setup. This article on Quick Capture is taken from one of the lessons in the new course.

The Ultimate Guide to Quick Capture in Ulysses

Over the past two years, my usage between Mac and iPad has flip-flopped. And these days I use my 11-inch iPad Pro for just about everything. Especially all writing. So over on The Sweet Setup I just posted an article that gives a look at what I’m using these days to do all my writing.

(Side note: If you’re looking for the wallpaper I’m currently using on my iPad, it’s from my Blurry Kansas City photos which you can find along with the the high-res versions here.)

My iPad Writing Setup

“If you care about your thoughts, keep them.”

I got a lot of inspiration from this brief article by Derek Sivers on the benefits of a daily diary and topic journals.

I’m already a fan of regular (if not daily) journaling. I’ve been logging stuff into Day One for years. And something I began doing at the beginning of this year is to keep a daily “highlight” journal along with my daily habit tracking.

Over the past couple years I have been continually interested in improving my note taking and learning skills (especially as related to books), maturing my system for idea capture, and just trying to get better at doing more writing.

But the “Thoughts On” journal that Derek wrote about in his article was a new idea to me. It’s so simple and it makes so much sense.

Derek writes:

For each subject that you might have ongoing thoughts about, start a separate “Thoughts On” journal. Whenever you have some thoughts on this subject, open up that file, write today’s date, then start writing.

Since reading Derek’s article last month I’ve already spent some time setting up my own “Thoughts On” inside of a new group in Ulysses. My topics so far include 8-Week Work Cycles, Finances, Delegation, and Leadership.

There are two awesome things about using Ulysses for these “Thoughts On” groups. For one, you can easily set up a specific group to place your own ideas, notes, and thoughts into.

Secondly, if you’re using Ulysses to store book notes, quotes, and other tidbits of information, then you can also create a Smart Filter that will aggregate any and all of those notes you have which are tagged with a keyword and/or which contain other words.


For more reading on this, see also André Chaperon’s weekend article on his knowledge processing system for creators.

There is a ton of nerdiness in André’s article, and I love it. One big takeaway for me was this piece of advice:

Don’t make the decision of what app to use when the moment arrises. Decided on the app now, and position it on your first screen where your thumb can click it easily.

I currently use Bear for all my quick-capturing of ideas right in the moment. And then I will move those ideas into Ulysses.

“If you care about your thoughts, keep them.”

A Brief Review of the Keychron Bluetooth Mechanical Keyboard for iPad

bluetooth mechanical keyboard for iPad

Last fall I helped Kickstart a new mechanical, bluetooth keyboard for my iPad: The Keychron. A few weeks ago it arrived at my house.

I’ve been a mechanical keyboard nerd for the better part of a decade now, using one clickety keyboard or another with my Mac since 2012. Now that I use the iPad for a significant amount of my work — especially my daily writing and editing — I’ve been considering a more fancy external keyboard for it as well. Because why not?

For about two years now I have simply been using the Smart Keyboard Cover (both with the 9.7” iPad Pro, then the 10.5”, and now the 11”). It is not a great keyboard by any means; but it’s been fine for me and I love the simplicity of just having it right there ready to go anytime I grab my iPad.

But when I saw the Keychron on Kickstarter, I thought it would be worth backing. While I don’t want to carry a keyboard with me when I’m out and about or traveling with the iPad. But I do like the idea of having a nicer keyboard at my home for the times when I’m using the iPad for writing while at my desk (such as at this very moment).

bluetooth mechanical keyboard for iPad

And so, what initially piqued my interest with the Keychron keyboard was that:

  • It has mechanical switches
  • It has LED backlighting for the keys
  • It’s Bluetooth
  • It has a dedicated Siri button.

In a moment I’ll share more about each of the above items.

Overall the Keychron looks beautiful. It’s a very clean, sleek, well designed keyboard.

Mechanical Switches

The Keychron uses low-profile blue switches. They are nice. While they are a bit less tactile they are also much quieter than my Filco Ninja with it’s Cherry MX blues, that’s for sure.

Typing on the keyboard feels like something right in the middle between my Cherry MX switches (which are big and bold) and the current bluetooth keyboards that Apple sells (which are thin and quiet).

bluetooth mechanical keyboard for iPad

LED Backlit Keys

Another delightful feature of the Keychron is that each key is individually backlit. I opted for the simple blueish-white LEDs you see above, but there was also an option for full RGB colors which I did not get. I don’t want my keyboard to be a disco holiday light show, I just want it to be backlit.

Anything which hinders the writing process is no good. Anything which aids is most welcome.

There is an LED “Light mode” toggle button. But, oddly and nonsensically, it sits just to the left of the arrow keys.

This keyboard takes it’s light modes a bit too seriously.

The first few days I had this keyboard I accidentally toggled the light mode about every 100 words. Which is not great.

There are 10 different LED settings. Nine of which are some sort of fancy, wildly-distracting, party trick of light dancing around underneath the keys.

Which means that if you accidentally hit the light switch on the keyboard, suddenly the LEDs are bouncing around and flickering. And since there are about 10 different settings, you have to hit the button 10 more times to get back to where you were.

Bluetooth

Another selling point for me with the Keychron is that it’s bluetooth. Moreover, you can pair it with up to 3 differnet computers / devices. And you can then switch between those devices using the keyboard. Pretty clever.

It also has a USB-C connection that it uses for charging and connecting directly to a computer if you don’t want to use Bluetooth.

But for some reason, the USB-C to USB-C cable I use to charge my iPad doesn’t work as a way to wire the Keyboard to the iPad. I can connect the Keychron using my USB-C to USB-A adapter that I bought from Apple.

So, to reiterate the awkward and nerdy wired configuration: Even though the iPad and the Keyboard both have USB-C ports, I have to use a USB-C to USB-A cable and then plug that in to with a USB-A to USC-C adapter. And the adapter has to be plugged into the iPad. If it’s the other way around, it doesn’t work.

Also worth noting is that the iPad will charge the keyboard’s battery when the two are connected via USB.

Siri

On my iPad I use both Spotlight and “Text to Siri” as a sort of quick-action, keyboard shortcut workflow.

Having the ability to bring up the Text to Siri interface without having to press and hold the power button on the side of the iPad makes things much nicer.

Alas, on the Keychron, the Siri button is Mac-only. This is a huge bummer and I wish they would have been more clear / upfront about it on their Kickstarter page as I thought the Siri button would be able to bring up Siri on iOS as well.

A Brief Aside About Propping Up the iPad In Order to See the Screen While Typing on an External Keyboard

Sigh.

Apple’s Smart Keyboard cover (which I use and have attached to my iPad 90% of the time) will only prop up the iPad when it’s in the keyboard orientation. You cannot prop up the new iPads Pro in “media mode” the way you could with the previous generations and their Keyboard Cover.

Thus, for me to use an external keyboard like the Keychron along with the iPad means I have to have the keyboard portion of the keyboard cover sprawled out, sitting in front of the iPad and just behind the bluetooth keyboard. Ugh.

Now, I’m not a victim here; there are some workarounds for this. I could buy an iPad stand (the Twelve South Compass is awesome). Or I could also buy another case that lets you prop up the iPad, and then use that case when I’m using the external keyboard.

There’s also a partial workaround using the keyboard case I already have, but it only works if the iPad is on a rough-ish surface. You can flip the keyboard cover around like an “A Frame” and prop the iPad up that way. But on my desk, it just wants to slide open.
As you may have noticed from the photograph at the top of this article, my current solution has been to put the iPad on top of a used Baron Fig notebook. It’s not ideal, but it works for now I suppose. Shrug emoji.

bluetooth mechanical keyboard for iPad

Other Miscellany

  • The function and media keys all work as expected. So I can adjust the iPad’s volume and screen brightness, as well as control audio playback all from the keyboard.

  • There is also a screen grab button and a dictation button. The Screen Grab button works just like pressing the hardware Volume Up and Power buttons on the iPad, or hitting SHIFT + CMD = 4 on iOS: it takes a full screenshot and the puts you into the screenshot editing interface.

The dictation button, alas, is like the Siri button: it does not work on iOS. It just brings up the on-screen emoji keyboard.

Coda

I’m sad to say that after using the keyboard for a couple weeks my current feeling is that it is less than the sum of its parts. It’s a beautiful and well-made keyboard, and the more I use it the more it’s been growing on me. But for whatever the reason, it’s not delightful to use. And if you’re going to have a big, noisy keyboard, it ought to be nothing if not delightful.

Now the question remains: Do I keep using it because I’ve got it; bust out the Apple Extended Keyboard II that I’ve had in my office for 7 years; go back to using the Keyboard Cover that I’ve been using for a few years; or…. start further down this rabbit hole of bluetooth mechanical keyboards for the iPad?

A Brief Review of the Keychron Bluetooth Mechanical Keyboard for iPad

On Making the Switch From a Consumer to a Creator

Last week my friend Nathan Barry posted an article with 13 tips for making the switch from a consumer to a creator.

Suggestions number 3, 6, and 9 from Nathan’s list especially resonated with me since these three tips in particular had to do with the focus, intentionality, and routine of creating.

I also love how Nathan states right at the beginning that in order to make this shift you don’t have to become a fundamentally different person, nor do you have to make radical changes to your life. You just need to stack a handful of small changes together and let the momentum build.

Show Up Every Day, Poster by Sean McCabe


The ”Show Up Every Day” print by Sean McCabe that I have hanging in my office.
As you seek to build a creative habit, it is professional-grade to be intentional with that time. You do this by (1) planning ahead; (2) scheduling yourself time to work; and (3) removing as many distractions as possible. This is literally what any top performer does. (I made a simple Show Up Every Day Worksheet that’s at the bottom of this article if you’re interested.)

And, not that Nathan asked, but since we’re blogging here I wanted to add an additional suggestion to his already excellent list:

Be intentional about what you consume.

What I mean by this is two-fold:

  • Making the switch from a “consumer” to a “creator” does not mean cutting out all media consumption. (More on that in a second.)

  • And therefore, consider what types of media consumption leave you feeling inspired, excited, and energized versus those which leave you feeling tired or complacent.

Which types of media take from you and which types give to you?

If I spend 15 minutes mindlessly scrolling Instagram or Twitter, I do not feel inspired or recharged.

But if I spend 15 minutes reading a book or a thoughtful article that’s saved in Instapaper, then my brain is usually bouncing with ideas and fresh inspiration.

Nathan’s article is all about making the switch from “consumer” to “creator” but I want to underscore the fact that the right kind of consumption helps with creating.

I think this is so valuable that not only do I have a habit goal to write every, I also have a habit goal to read every day.

Moreover I just deleted the social media apps from my iPhone so that I would have less opportunity for non-productive media consumption. (Even Peter McKinnon recommends quitting social media as a way to help overcome creative block.)

In his book, First Things First, Stephen Covey writes about what he calls “Sharpening the Saw”.

We often get so busy “sawing” (producing results) that we forget to “sharpen our saw” (maintain or increase our capacity to produce results in the future).

It took me a few years to to realize it was okay (even necessary) for me to take time away from “producing and creating” in order to maintain and increase my capacity to do my best creative work.

One of the ways you experience burn out is when you consitently try to create without any fresh, incoming inspiration. It’s like driving a without ever stopping to fill up — evenatually you will run out of gas.

Showing up to do the work is the noble part of the endeavor. But let us not get so busy producing that we forget to maintain and increase our capacity to keep producing results.

On Making the Switch From a Consumer to a Creator

A Review of the Clear Habit Journal

Clear Habit Journal

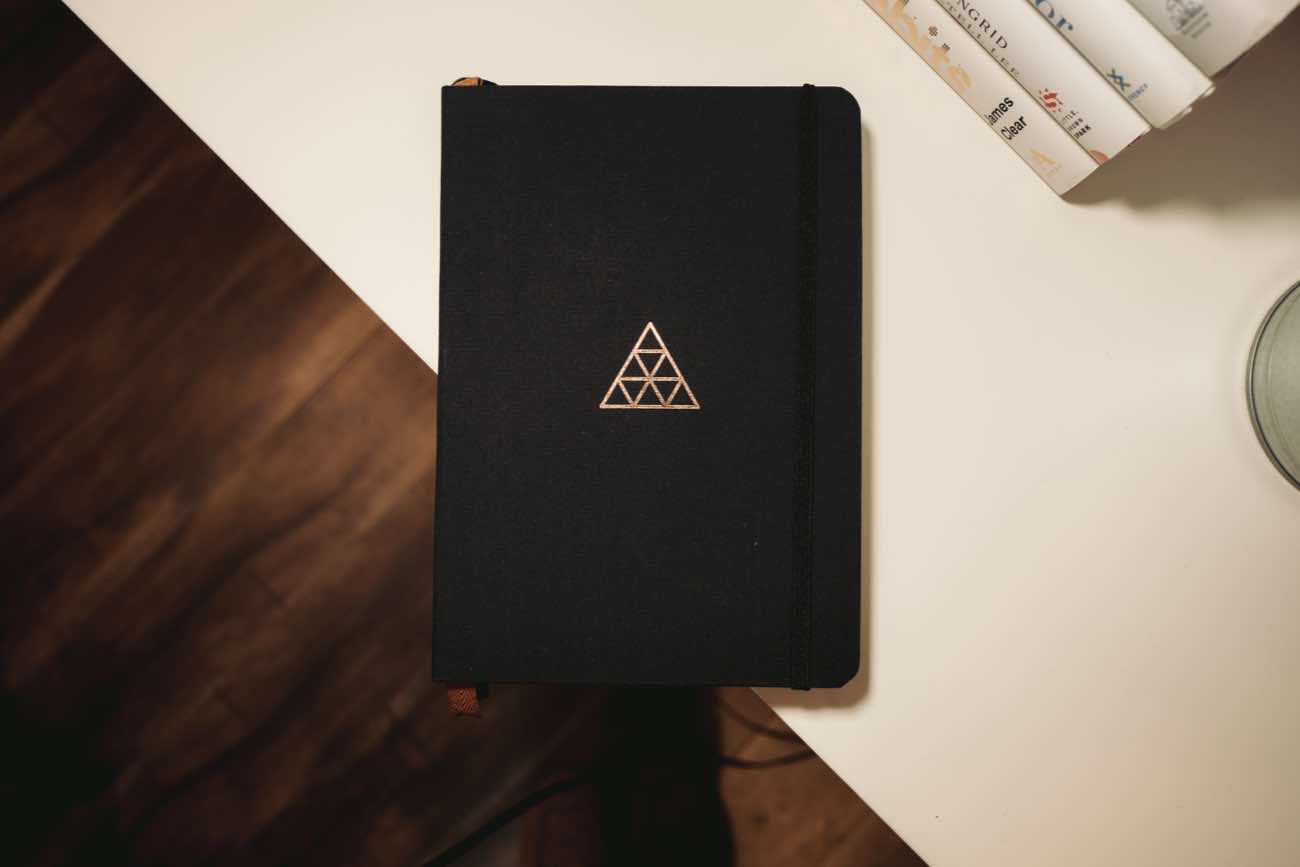
A few days ago I received my pre-ordered copy of the new Clear Habit Journal.

This notebook is a collaboration between some good friends of mine: Joey and Adam at Baron Fig and James Clear.

I have used a Baron Fig notebook just about every single day for the past five years — it’s a central tool in my Hybrid Productivity Method.

So needless to say, I was wildly excited to check out this new notebook. I may or may not have completely geeked out last Saturday when my copy arrived.

The design of this new notebook is absolutely fantastic! I love the feel, the colors, the type, the layout, the gold foil stamp on the front. Everything about this notebook just screams quality and attention to detail.

What I also love about the Habit Journal is how simple it is. For me, as a hard and fast notebook user, the Clear Habit Journal is exactly the right mix of useful templates with open, blank pages.

In the front of the Journal is an “Index” spread followed by a “daily log” section where you write down one line per day.

The Index is where you build your own table of contents as you go, writing down any important sections and the page number(s) they’re on. I do this in all my journals, so it’s great to have it pre-templated already.

The One Line Per Day section is absolutely brilliant. You choose your own writing prompt, and then have one line to answer that prompt each day. There are 31 lines per page, and 12 pages. So you get a section of your journal that has an easy-to-read summary of your entire year.

Clear Habit Journal

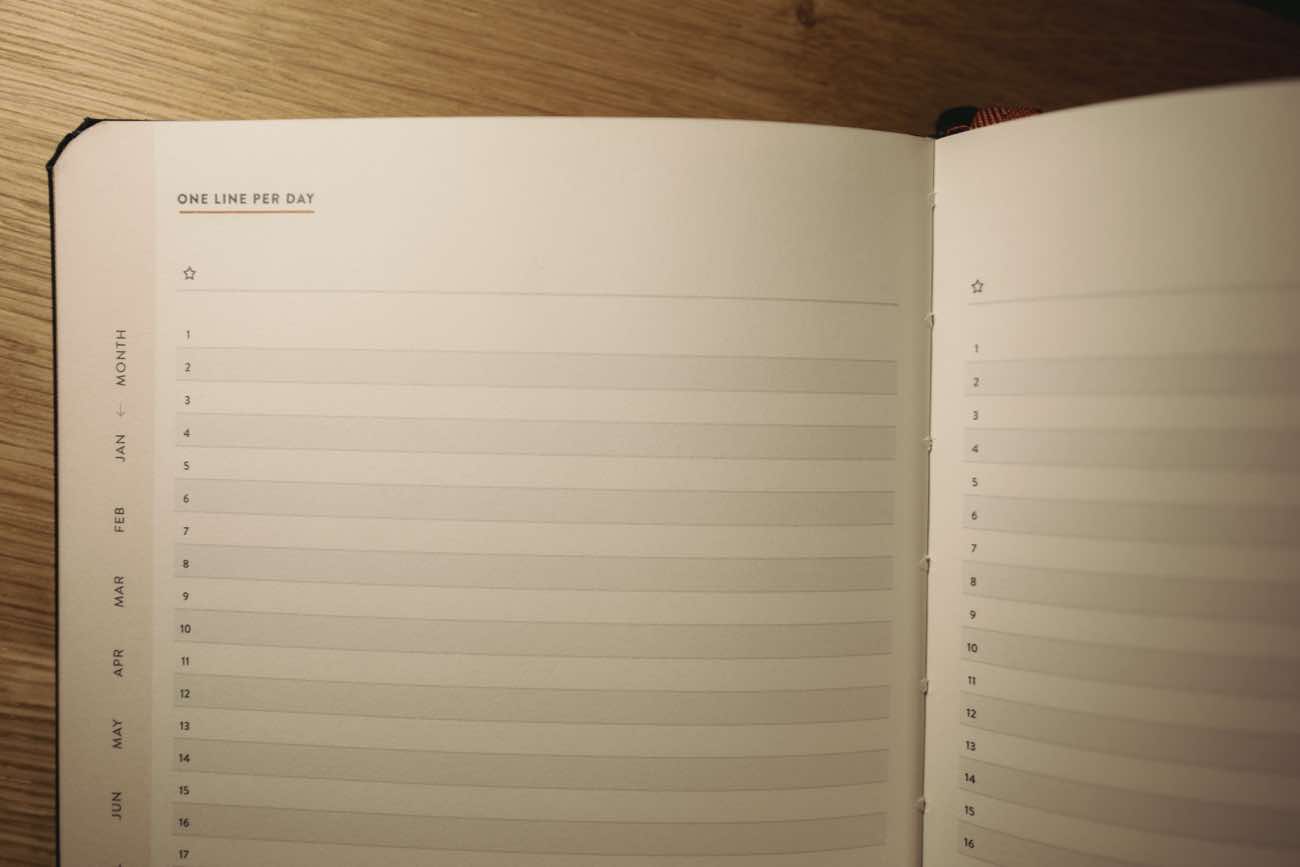
Your daily prompt can be whatever you want it to be. For January my prompt is “Highlight of the Day”. But you could do anything. Such as your Most Important Task, or Something You’re Grateful For, or Something You Learned, etc.

In the back of the Journal are two more sections. A “Habit Tracker” and a “Toolkit” section.

The Habit Tracker is nice and simple. You simply write down the habit / routine that you are workin on and then you check the box that corresponds with the day of the month.

Having clarity about your goals for the year is critical. And then tracking your progress on your goals is what turns them into reality.

As I’ve mentioned in previous blog posts, there are two new routines I’m focusing on this year: more time reading and learning and more time writing and editing. So I have my normal routines that I already track, which include my workouts and personal prayer times, and now I also am tracking time spent reading, writing, and editing.

Clear Habit Journal

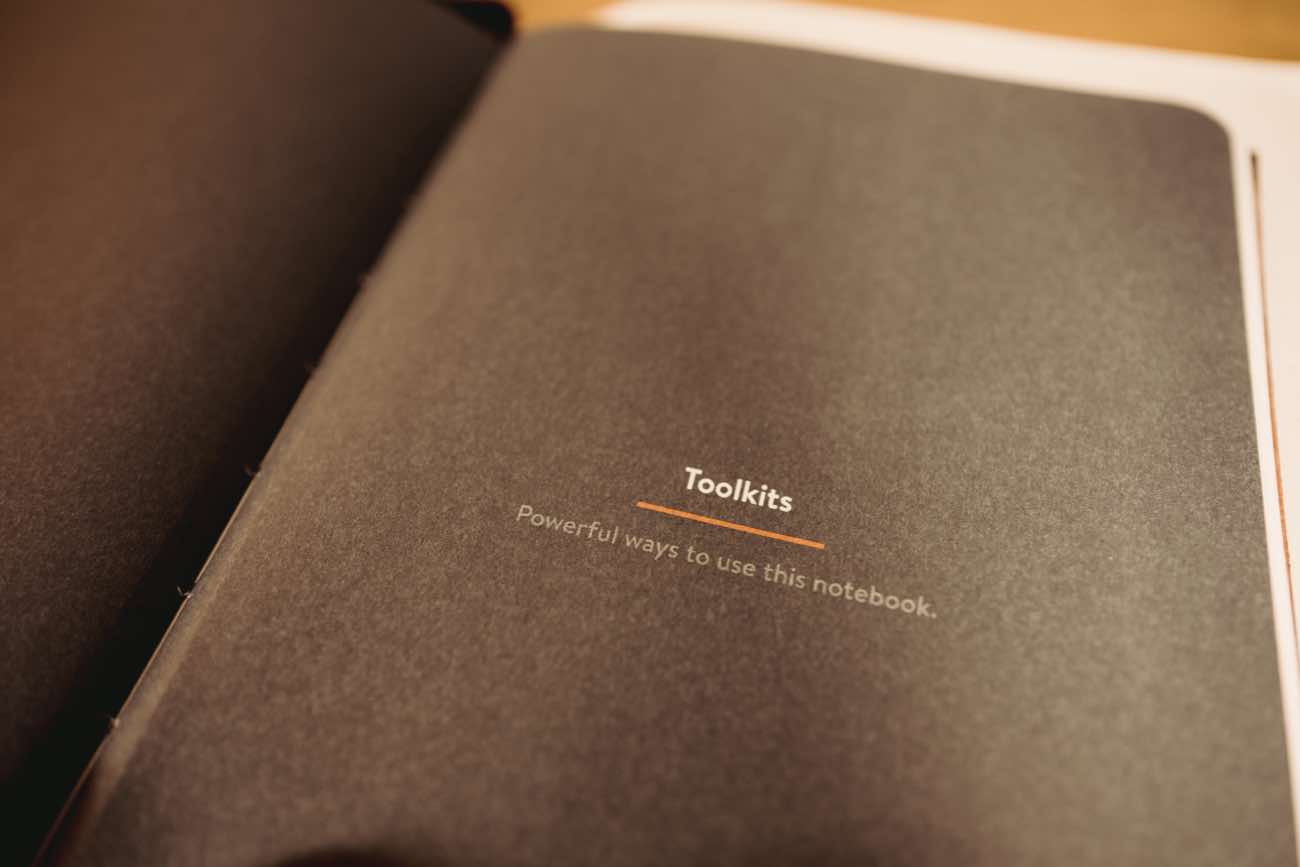
Then there is the Toolkit section which has some ideas and instructions for how to use the 167 dot-grid pages that comprise the bulk of the journal.

James wrote out several suggestions for how to make better decisions, how to think more clearly, how to prioritize things, how to be productive, how to log your workouts and/or your diet, etc.

One of the pages is on how to make smarter decisions by writing out your prediction, the decision, and then reviewing it again at a later date. That is a brand-new approach for me and look forward to implementing it.

There are other helpful little details as well. Every page is numbered, there is a pocket in the very back cover, there are two bookmark ribbons, and the Habit Tracking pages are perforated so you can remove them if you want.

All in all, the Clear Habit Journal is a great mix of helpful templates and then blank space. It’s useful and adaptable. And it fits exactly how I do and want to use a notebook. I really love this notebook.

But… (and this is a very big but)

There is one — ahem — large problem: The size of notebook itself.

My singular frustration is that the Journal comes in only one size: the normal-sized, “Flagship” Baron Fig.

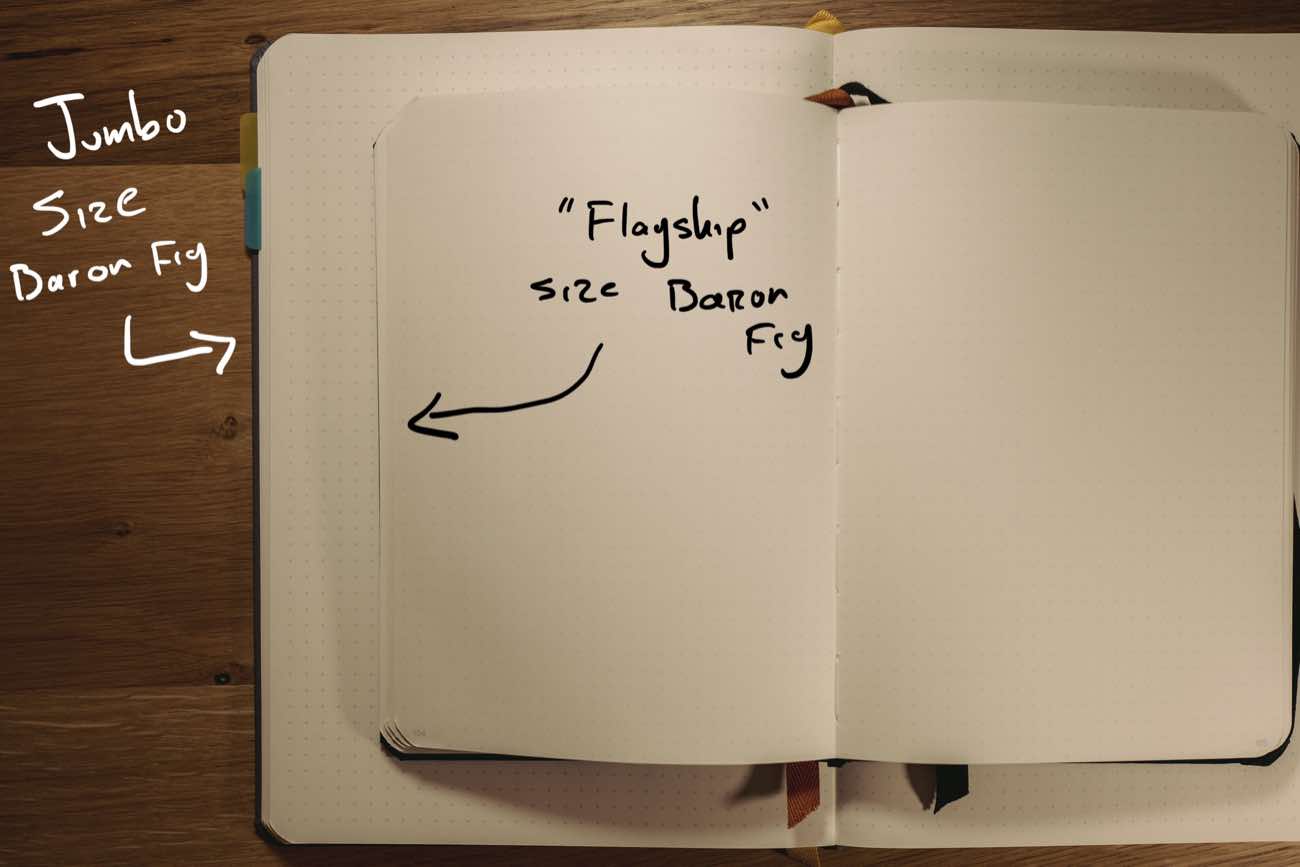
I have used many of this sized notebooks over the years. And so I know from my years of experience that this sized Baron Fig will last me about 6-9 months at most. However, the way that the Clear Habit Journal is set up, you would ideally use it for a full year because it has 12 months worth of daily prompts in the front and 12 months worth of habit tracking in the back.

In early 2017 I began using the new “jumbo” size Baron Fig and I absolutely love it. Not only do I love the largest pages because they give more room to write and draw and just spread out my ideas. The bigger size pages also make it so that a Jumbo notebook lasts me more than a full year.

I decided to throw my gripe out the window, and began using the Clear Habit Journal for a few days. But I just couldn’t do it. I kept thinking about how once August got here I’d be out of the dot-grid pages and would have to start a new notebook, and my year’s worth of one-line prompts and habit tracking would have to either be migrated or split up.

But then, also, the smaller pages just felt too crowded. I really missed the extra real estate to let my writing and ideas breath and spread out.

So, alas, I ended up switching back to my Jumbo size notebook. But I brought with me some of the ideas and design elements from the Clear Habit Journal (thanks, James!) and I am incorporating those elements into my own notebook to improve the way I use the jumbo Baron Fig.

Basically what I’m doing is combining the daily prompts and the habit tracker into a single spread that looks like this:

Bullet Journal Daily Habit Tracking

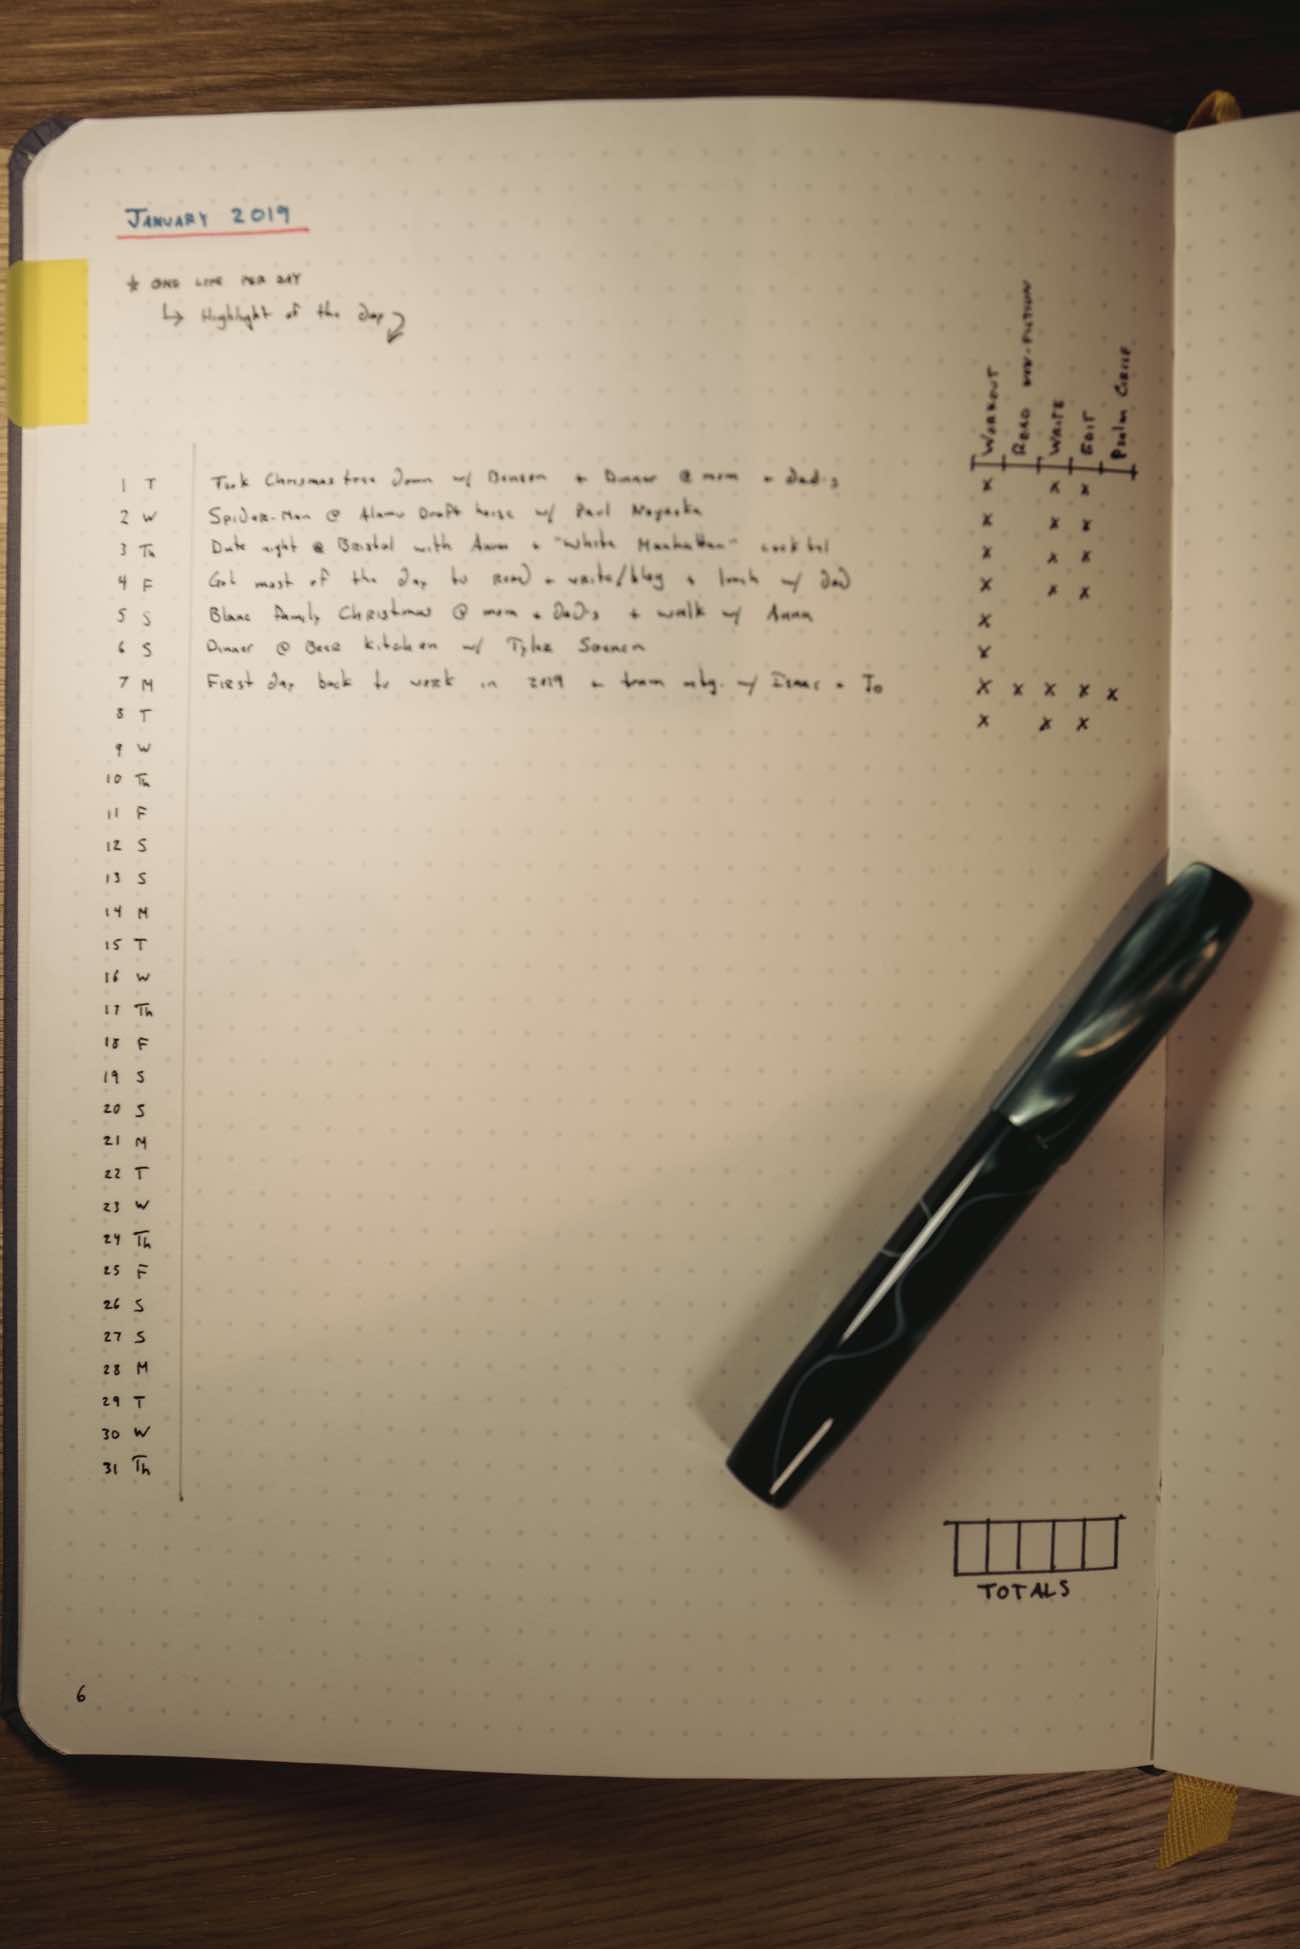
Thanks to the larger size of the Jumbo Baron Fig, I have space to fit the “one line per day” prompt and also track up to 5 or 6 daily habits… all in one spot. I reserved 12 pages toward the front of my Jumbo Baron Fig notebook to accommodate a page like this for each of the 12 months of the year.

Clear Habit Journal

One huge advantage of a notebook like the Clear Habit Journal is that a lot of the template design work is done for you. This can save a lot of time and mental energy. (I, for instance, spent about 90 minutes last night manually creating the new index page, monthly habit tracking page, and hand writing in the page numbers for my Jumbo notebook.)

I am sad that I won’t be using the Clear Habit Journal, because it is such an excellent product. But at the end of the day the size turned out to be a deal breaker for me.

But I am probably more the exception here. I know that there are many people who prefer Baron Fig’s traditionally-sized flagship notebooks. And then I heartily recommend the Clear Habit Journal. It’s fantastic. And if they ever make this notebook in the Jumbo size then I’ll be the first in line to get one.


If you want to order a notebook from the folks at Baron Fig, use this link.

A Review of the Clear Habit Journal

As I mentioned on Tuesday, one of my main areas of focus this year is on improving and giving more time to my writing and editing routine.

As you may know, Ulysses is the central spot for where I store all my notes, research, and other tidbits of inspiration. It’s also where I toss all my writing ideas, and it’s where I actually do all my writing. (Mostly on iPad these days.)

What’s so awesome about Ulysses is that it excells at each of these functions: it is ideal for capturing ideas and it’s also the best app there is for doing the writing.

If, like me, you’re looking to do more writing as we begin 2019, then you should check out Ulysses.

And, to help you get off to a great start, over on The Sweet Setup I put together seven links to the best articles, tips, tricks, resources, and other how-tos that we have.

Want to Write More in 2019?

How I Approach My New Year Goals

Don’t go crazy.

I approach my New Year Goals by first looking at the things in my life that are working well and the things that are not.

Then I choose a few small course corrections that will help move me more in the direction I want to go.

I do not overhaul my life on January first. Instead, I pick a few things that I know I can stick with. The compounding impact of small routines done regularly is so much more powerful than that one giant event.

Here are two actual examples for me in 2019 — one related to health and the other related to writing.

I have already been focusing quite a bit on my physical health in 2018. I finished out the year with 90 days in a row of perfect activity on my Apple Watch. I did that by focusing on one thing: doing one workout every single day.

Now that my workout routine has settled in, I’ll be taking the next step by also getting more focused on my diet. I don’t yet have the specifics, but I do know that I will begin taking small steps to improve what I eat to help give me more energy and long-term health beyond what I am currently eating.

My second example is with writing. In 2018 I spent quite a bit of time writing every day. But very little of my writing got published here to this site and, to be candid, that bums me out.

The slow publishing cadence here is not for shortage of time or ideas. I take time every day to write. And in my “ideas” folder in Ulysses has 213 notes that total up to roughly 35,000 words!

So the bottleneck with publishing to my site is that I have not been taking the time to turn my ideas and notes into edited blog posts that I can publish.

So, as I move into 2019, one thing I’ll be focusing on more is to get my writing out here onto the blog. Thus, my focus will be to spend at least 15 minutes per day editing my ideas and notes, so as to turn them into published posts.

While I’m not yet committing to a specific cadence of output here on this site, between you and me, I’d like to publish 100 posts in 2019 with one going up every Tuesday and Thursday.

How I Approach My New Year Goals

My iPad Home Screen

Gosh, it’s been about a year now since the 10.5” iPad Pro came out. I bought one right away, and it has become one of my favorite gadgets of all time.

I’ve had an iPad since the very beginning. I stood in line on that Saturday morning in April 2010 to buy the original iPad. And since then I’ve also owned an iPad 2, iPad 3, a 2nd-gen iPad mini, a 9.7” iPad Pro, and now, of course, the 10.5” iPad Pro.

The iPad Pro (with iOS 11) is not like the other iPads. In fact, it feels to me like what the iPad was meant to be all along: Fun, powerful, versatile, and not annoying.

It’s the “not annoying” part that has finally come around. The iPads of the past have always been fun and versatile and powerful to an extent. But they also have always had certain limitations that brought about frustrations at times.

Thanks mostly to iOS 11, the iPad is fun, powerful, and versatile. Full stop.

Shawn Blanc iPad Pro

As you may know, on Monday Apple is kicking off their annual conference: WWDC.

I’ll be out there in San Jose for a few days going to live podcast events and meeting up with my fellow Apple nerd friends. And, needless to say, I’m excited about what Apple will announce on Monday at their big keynote event.

In conjunction with the jumbo-sized Baron Fig notebook, my iPad has become a regular part of my every day creativity and productivity.

Even though I have an iMac with a fun and clicky keyboard at my desk, I find myself doing nearly as much work from the iPad as from my Mac. This is thanks entirely to a few things that, up until last year, really didn’t exist on the iPad.

Obviously, there is iOS 11 (“The iPad Release”) with its side-by-side app views, drag and drop, and, of course, the Files app itself with its system-wide integration which has been a huge game changer. (I’ve got a whole other story about how Dropbox has basically become obsolete for me, but we’ll save that for another time.)

And then, there are the apps I use most: Ulysses and Things. Both of which are world-class on the iPad (especially so with the most recent updates to Things 3.6 and Ulysses 13.)

All that said, today I wanted to share a bit about my current iPad setup so that if anything changes next week, there’d be a benchmark to compare against.

Shawn Blanc iPad Pro Home screen

Hardware-wise, I use one of Apple’s smart keyboard covers with my iPad. It’s a pretty great keyboard — it’s just fine to use for typing, and I love that it can also fold back behind itself to prop up the iPad, and it easily pops off the side if I want to use the iPad strictly as a tablet.

As for apps, here’s a list of all the apps I use on my iPad the most (not including Ulysses or Things which I already mentioned above).

  • Basecamp: This has become command central for the whole Blanc Media team. We run everything in and through Basecamp. (No more Dropbox, Slack, or email.)
  • Bear: Some day I’ll write more in depth about the differences of how I use Bear versus Ulysses. But, in short, Bear is for all the simple and temporary stuff like shopping lists, travel plans, or research for buying and installing Jeep parts, etc.
  • Day One: My biggest use for Day One on the iPad is when I do my weekly reviews on Sunday afternoons.
  • Music: For listening to jams when writing and working.
  • Paper: For doing the occasional sketch to accompany an article (like this one).
  • Safari: My web browser of choice. It’s fast, native, and I use iCloud tabs quite a bit as I love the ability to get to any web pages I have open on my other devices.
  • 1Password: Despite the prevalence of iCloud Keychain, 1Password is still a must-have app. I use it constantly, and even keep it in my iPad’s dock for quick access.
  • Mail: While it certainly leaves a lot to be desired in terms of search and integrating with 3rd-party apps, I still appreciate its simple clean design.
  • CropSize: This is an iOS app that lets you crop and resize images and export them for the web. You can even save particular “workflows” and simply apply that saved process to one or multiple photos with just a few taps.

I can’t wait to see what Apple has up their sleeve on Monday for iOS 12. One thing I’d love to see would be keyboard shortcuts for the share sheet (which is something that Michael Rockwell mentioned about a week ago). It’d mean being able to save a web page to Instapaper or add a URL to Things through a keyboard shortcut rather than through a few taps.

At some point the thought does become: why not just use a laptop?

There are a few things here and there that would be awesome on an iPad. But what is also so great about the iPad is how you can pop off the keyboard and use the device like a tablet. Rotate it into portrait mode and read from it. Draw on the screen. Drag and drop things. Build-in internet connection anywhere.

It’s all of those touch-screen-tablet-specific-abilities that make the iPad so great and versatile. It’s not about making the iPad more Mac-like, rather it’s about making the iPad easier to use.

My iPad Home Screen

Ship when it’s useful, not when it’s done

Something I have kept in front of me for the past six months or so has been this mindset:

Ship it when it’s useful, not when it’s done.

(I think it was Jason Fried who said it, but if not it sounds like something he would say.)

This metric of shipping when a thing is useful was what I kept before me when working on our Learn Ulysses course, the Plan Your Year workbook, and All the Things.

Shipping a product when it’s useful is a far more tangible metric for creating things and putting them out there.

Because — and let’s be honest — in the mind of the creator, a project is never done. There is always one more detail or element or idea that needs to be fine tuned or figured out.

So, instead of waiting until you’re done, step back and look at what you’re working on and ask yourself, Is this useful to others right now?

If the answer is yes, then ship it. If the answer is no, fix it.

Ship when it’s useful, not when it’s done

Ryan Holiday defines a commonplace book thusly:

A commonplace book is a central resource or depository for ideas, quotes, anecdotes, observations and information you come across during your life and didactic pursuits.

More or less, my commonplace book exists within both Ulysses and Day One. With the former holding my ideas and quotes, and the latter holding my observations and information.

Over on The Sweet Setup, my friend Chris Bowler wrote a three-part series on keeping a commonplace book. Part One gets in to the what and why, and parts two and three get in to the details of how to toss all that stuff in to Day One.

Keeping a Commonplace Book with Ulysses or Day One